[Nodejs] TodoList實作
TL;DR
TodoList實作。本篇沒有使用到資料庫。
純粹介紹使用Nodejs的http createserver簡單範例。
因為目前還沒有使用到資料庫,所以我們資料都是存放在nodejs on起來的主機上,資料內容其實是放在記憶體上的。所以當server重啟的時候,資料就會消失
參考資料
相關連結
- 跨來源資源共用(CORS) | MDN
預備知識
UUID
- UUID | Wiki UUID是通用唯一識別碼(Universally Unique Identifier)的英文縮寫,具備唯一性(重複率趨近0,可忽略)
在製作許多App的時候都需要仰賴這個唯一的值(類似我們身分證)
安裝方式可以使用npm去安裝
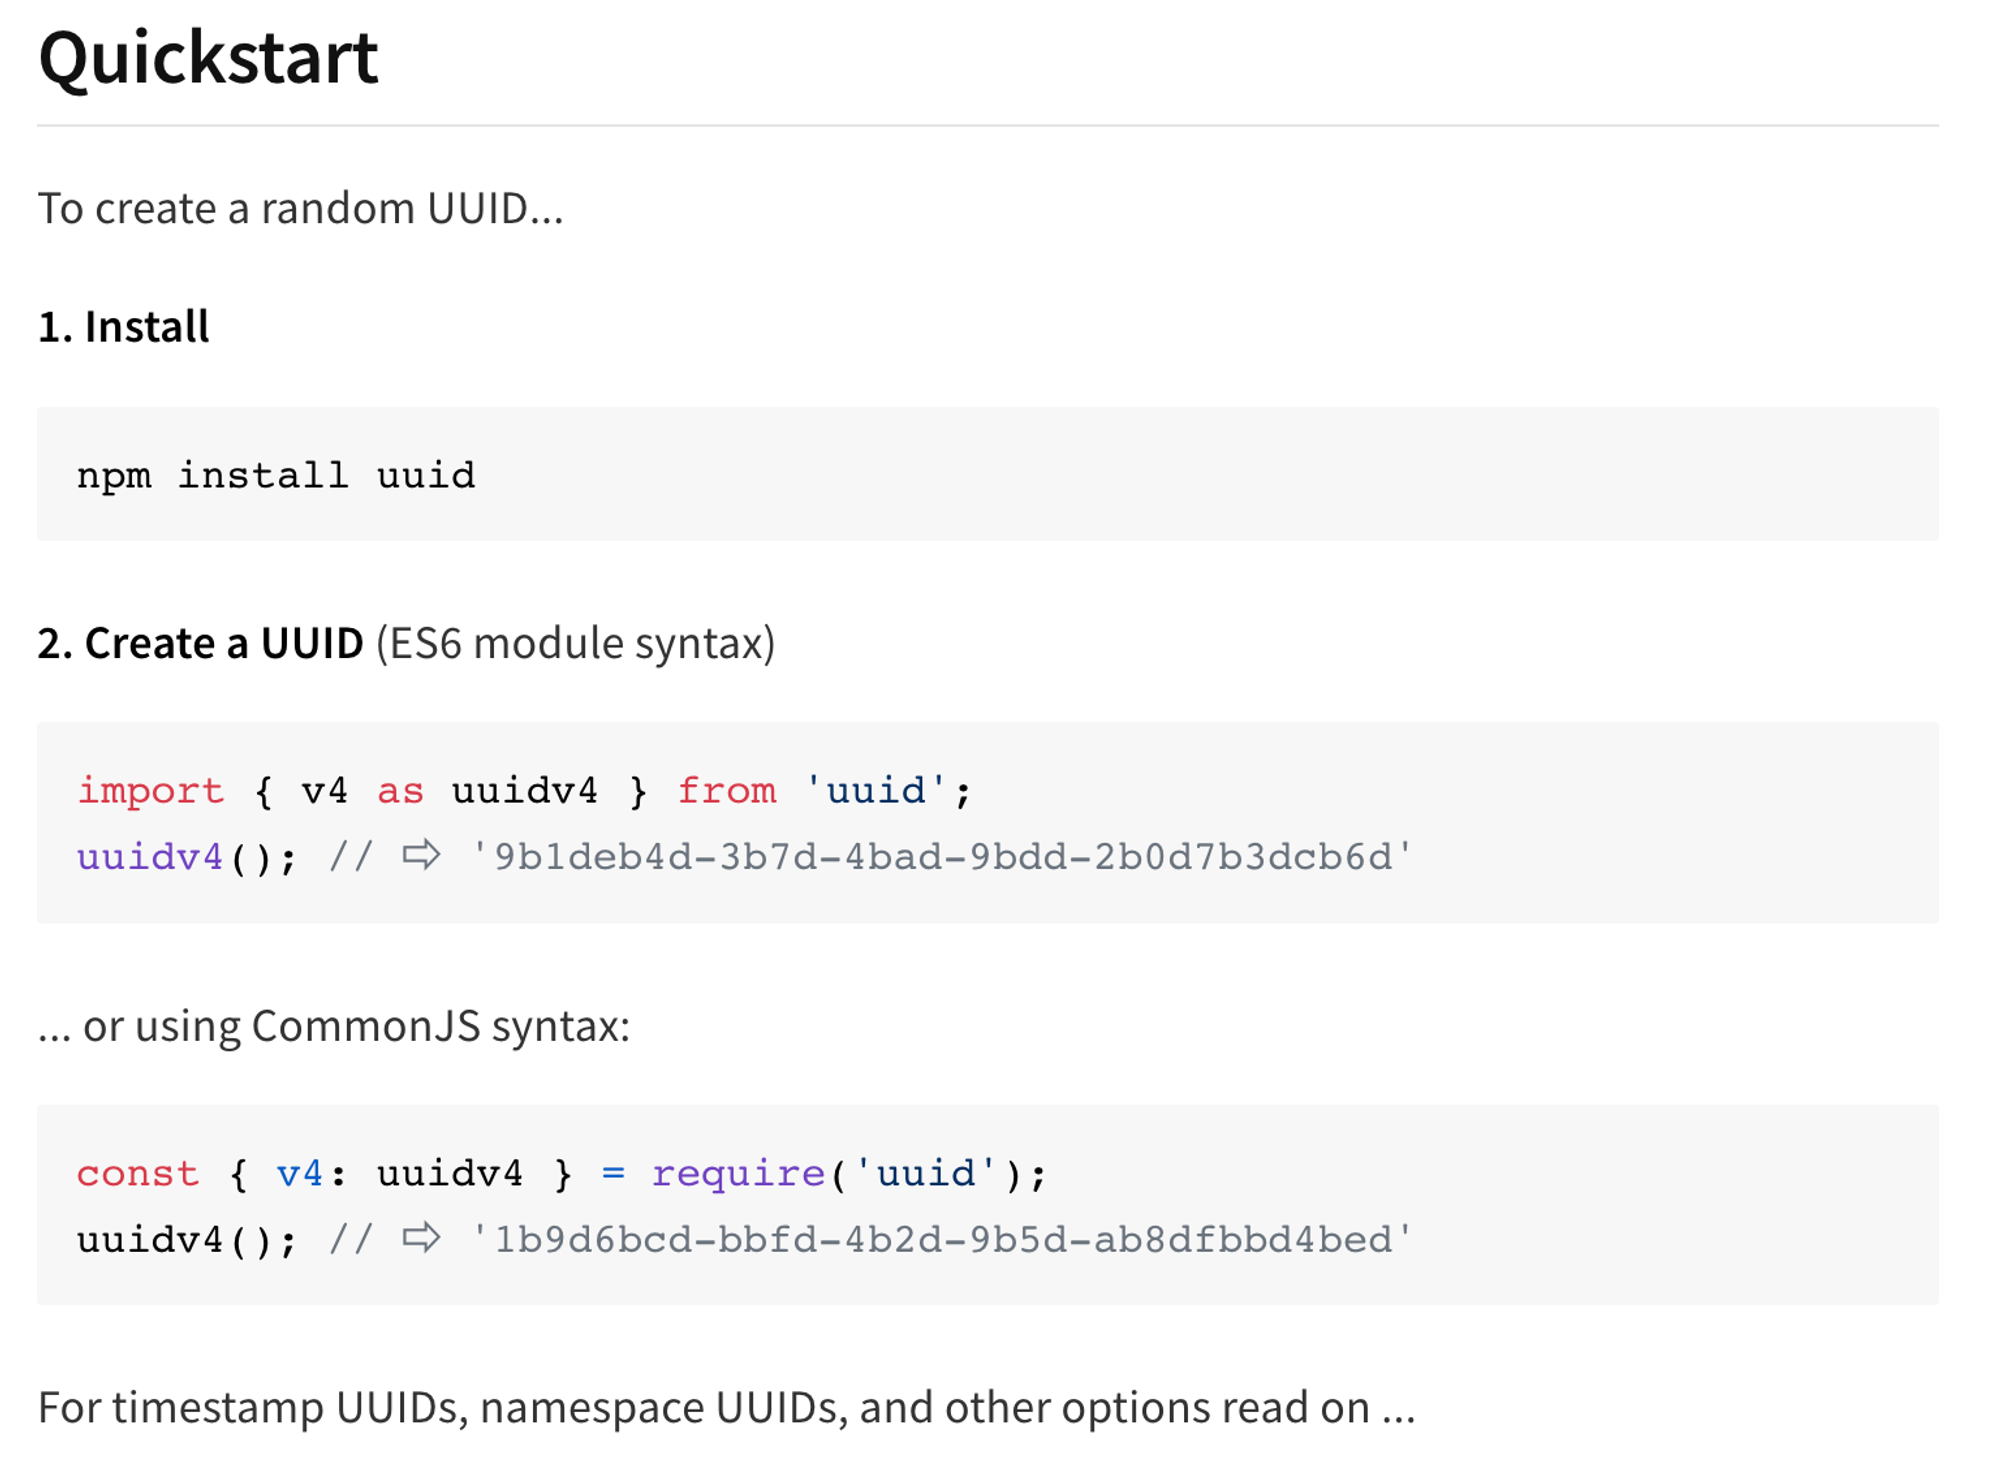
簡單範例如下:
const {v4:uuidv4} =require ('uuid');
console.log(uuidv4());
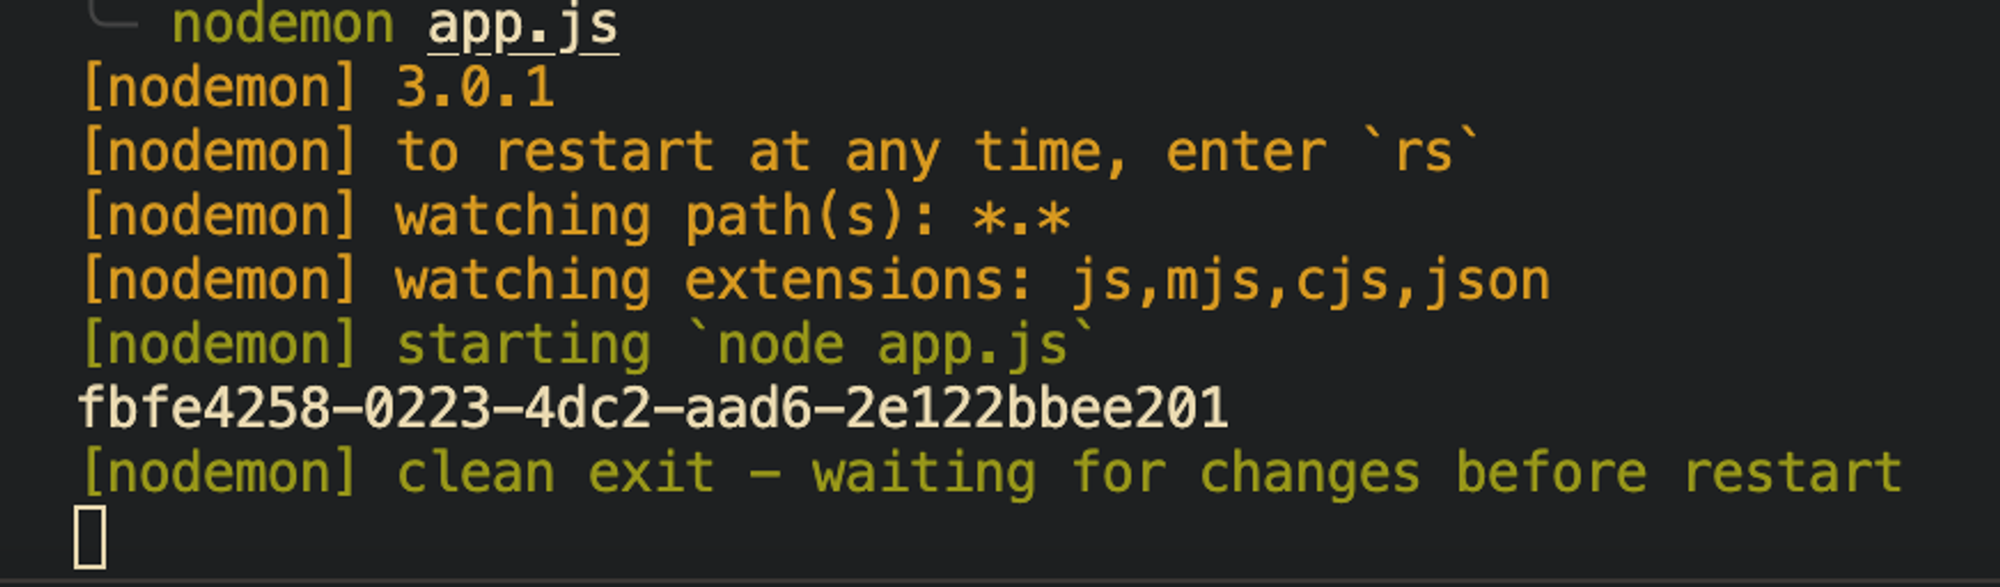
執行結果:
後續如果我們在新增待辦事項的時候,就可以設計資料內容存在UUID,讓我們可以去辨識這筆唯一的值
const todo={
	"title":"待辦事項1",
	"id":uuidv4()
}
try/catch
有時候後端程式在執行的時候,前端傳來的值格式不符合我們希望的,這時候有可能就會造成一些錯誤
例如今天前端傳來一個obj,但是傳送過來是使用字串形式傳來的,所以我們需要再使用JSON.parse(obj)去將字串轉型成物件
但是如果今天obj傳來的時候根本沒辦法解析成字串,則javasscript就會出現錯誤
這時候我們就可以使用try&catch語法去捕捉這個錯誤,讓javacript知道在錯誤發生的時候應該要怎麼處理
範例如下:
const objWront='{title}';
try{
		const resObj2 = JSON.parse (objWrong) ;
		console. log (resObj2);
}catch{
		console.log(“程式出錯 !");
}

//程式出錯!
什麼是RESTful API
這次我們要製作Todolist的API
RESTful是一種API風格,利用路由當作名詞,method當作動詞
如同前面的首頁,我們可以根據不同的method去做到不同的回傳值
今天在製作Todolist RESTful API的時候,我們的API列表會長得像以下這樣
| 操作行為 | 路由 | 方法 |
|---|---|---|
| 取得所有待辦事項 | url/todos | GET |
| 刪除所有待辦事項 | url/todos | DELETE |
| 新增待辦事項 | url/todos | POST |
| 刪除指定待辦事項 | url/todos/uuid | DELETE |
| 編輯指定待辦事項 | url/todos/uuid | PATCH |
可以由上面的路由表發現,我們很多行為其實都是使用到同一個路由(endpoint),只是方法有所不同
開始撰寫TodoList
createServer
const http=require('http');
const requestListener=(req,res)=>{
  res.writeHead(200,{"Content-Type":"text/plain"})
  res.write("Hello")
  res.end()
}

const server=http.createServer(requestListener);
server.listen(3001);
這邊將function給拆出來,並且賦予到requestListener上。以及另外創建一個變數server,將監聽port的功能拆分成兩行。
404頁面製作
有時候使用者可能造訪到我們沒有撰寫路由的頁面
這時候就要告訴使用者走錯地方
我們可以透過使用者發出http request中的資訊去判斷,這裡主要是使用req.url以及req.method去判斷
這邊僅顯示上述程式碼中的requestListener的內容,其他模組載入以及伺服器監聽port號碼之類的就不另外撰寫
const requestListener=(req,res)=>{
  if(req.url==='/'&&req.method==="GET"){
    res.writeHead(200,_headers);
    res.write("我是首頁");
    res.end();
  }else if (req.url==='/'&&req.method==="DELETE"){
    res.writeHead(200,_headers);
    res.write("刪除成功");
    res.end();
  }else{
    res.writeHead(404,_headers);
    res.write("這裡沒有任何東西!");
    res.end();
  }
}
Header設定
如果我們回傳的內容希望被解析為JSON,伺服器必須要在header內帶入回傳值的格式,告訴瀏覽器我們回傳的是JSON的內容。
const _headers = {
   'Access-Control-Allow-Headers': 'Content-Type, Authorization, Content-Length, X-Requested-With',
   'Access-Control-Allow-Origin': '*',
   'Access-Control-Allow-Methods': 'PATCH, POST, GET,OPTIONS,DELETE',
   'Content-Type': 'application/json'
}
這邊設定了一些跨網域的設定,最重要的是將Content-Type設定為application/json
我們需要先使用JSON.stringify()去將物件轉換為字串的格式,傳送給瀏覽器
接著瀏覽器會根據我們提供的Content-Type,再將該字串解析為json格式
詳細程式碼如下:
const http=require('http');
const { json } = require('stream/consumers');
const requestListener=(req,res)=>{
  // 先定義好headers的變數,之後就不用一直撰寫Content-Type
  const _headers={
    'Access-Control-Allow-Headers': 'Content-Type, Authorization, Content-Length, X-Requested-With',
    'Access-Control-Allow-Origin': '*',
    'Access-Control-Allow-Methods': 'PATCH, POST, GET,OPTIONS,DELETE',
    // 設定回傳值要使用json去解析
    'Content-Type': 'application/json'
  }
  if(req.url==='/'&&req.method==="GET"){
    res.writeHead(200,_headers);
    res.write(JSON.stringify({
      "status":"success",
      "data":[]
    }));
    res.end();
  }else if (req.url==='/'&&req.method==="DELETE"){
    res.writeHead(200,_headers);
    res.write("刪除成功");
    res.end();
  }else{
    res.writeHead(404,_headers);
    res.write("這裡沒有任何東西!");
    res.end();
  }
}

const server=http.createServer(requestListener);
server.listen(3001);
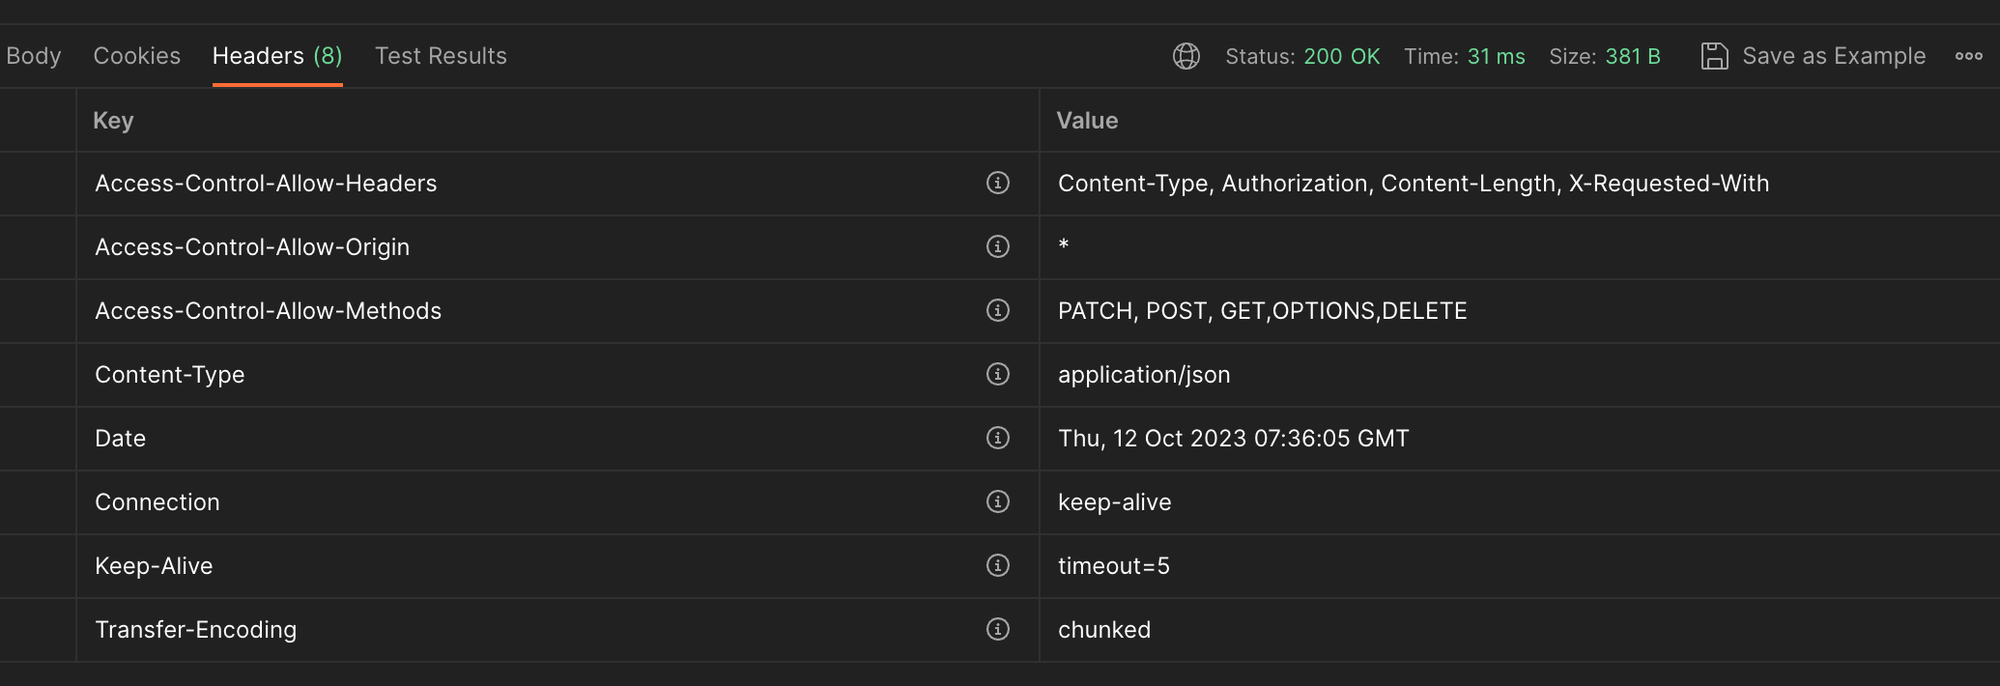
當我們今天造訪首頁的時候,回傳的內容會解析為json格式
我們也可以在postman上面response的headers內找到我們剛剛在_header內所設定的跨網域回傳設定
調整404回傳內容
根據前面的JSON格式去調整404回傳json格式內容,並且帶上錯誤訊息
const http=require('http');
const { json } = require('stream/consumers');
const requestListener=(req,res)=>{
  // 先定義好headers的變數,之後就不用一直撰寫Content-Type
  const _headers={
  'Access-Control-Allow-Headers': 'Content-Type, Authorization, Content-Length, X-Requested-With',
  'Access-Control-Allow-Origin': '*',
  'Access-Control-Allow-Methods': 'PATCH, POST, GET,OPTIONS,DELETE',
  // 設定回傳值要使用json去解析
  'Content-Type': 'application/json'
  }
  if(req.url==='/'&&req.method==="GET"){
    res.writeHead(200,_headers);
    res.write(JSON.stringify({
      "status":"success",
      "data":[]
    }));
    res.end();
  }else{
    res.writeHead(404,_headers);
    res.write(JSON.stringify({
      "status":"false",
      "message":"無此網站路由"
    }));
    res.end();
  }
}

const server=http.createServer(requestListener);
server.listen(3001);
新增了status:false 告訴瀏覽器目前的狀態,讓前端可以根據這個status去顯示頁面。並且在message提示錯誤訊息
如果是使用axios等套件,套件會自動根據狀態碼來判斷是resolve或是reject。但是如果是使用fetch,並不會根據狀態碼來決定是否有錯誤產生,這時候就需要另外根據一個status的屬性來讓前端知道是正確取得資料或是錯誤的狀態。
設定Preflight(Method:OPTIONS)
- 跨來源資源共用(CORS) | MDN
如果今天是跨網域的時候,會觸發一個Preflight機制。這個部分沒有辦法在本地端去模擬。只有當我們在雲端主機上上架服務的時候,才會觸發。但是我們還是要撰寫這個功能。
const http=require('http');
const { json } = require('stream/consumers');
const requestListener=(req,res)=>{
  // 先定義好headers的變數,之後就不用一直撰寫Content-Type
  const _headers={
  'Access-Control-Allow-Headers': 'Content-Type, Authorization, Content-Length, X-Requested-With',
  'Access-Control-Allow-Origin': '*',
  'Access-Control-Allow-Methods': 'PATCH, POST, GET,OPTIONS,DELETE',
  // 設定回傳值要使用json去解析
  'Content-Type': 'application/json'
  }
  if(req.url==='/'&&req.method==="GET"){
    res.writeHead(200,_headers);
    res.write(JSON.stringify({
      "status":"success",
      "data":[]
    }));
    res.end();
  }else if(req.method==="OPTIONS"){
    // 加上Preflight的OPTIONS method回傳值,這邊只要簡單給予一個200ok的status就可以了
    res.writeHead(200,_headers);
    res.end();
  } else{
    res.writeHead(404,_headers);
    res.write(JSON.stringify({
      "status":"false",
      "message":"無此網站路由"
    }));
    res.end();
  }
}

const server=http.createServer(requestListener);
server.listen(3001);
取得所有待辦事項
今天在app.js內加上一個todos陣列,裡面存放各種待��辦事項
並且在GET首頁 的時候回傳todos陣列,程式碼如下:
const http=require('http');
const { json } = require('stream/consumers');
const {v4:uuidv4}=require('uuid');

const todos=[
  {
    "title":"今天要念書",
    "id":uuidv4()
  }
];
const requestListener=(req,res)=>{
  // 先定義好headers的變數,之後就不用一直撰寫Content-Type
  const _headers={
  'Access-Control-Allow-Headers': 'Content-Type, Authorization, Content-Length, X-Requested-With',
  'Access-Control-Allow-Origin': '*',
  'Access-Control-Allow-Methods': 'PATCH, POST, GET,OPTIONS,DELETE',
  // 設定回傳值要使用json去解析
  'Content-Type': 'application/json'
  }
  if(req.url==='/'&&req.method==="GET"){
    res.writeHead(200,_headers);
    res.write(JSON.stringify({
      "status":"success",
      "data":todos
    }));
    res.end();
  }else if(req.method==="OPTIONS"){
    // 加上Preflight的OPTIONS method回傳值,這邊只要簡單給予一個200ok的status就可以了
    res.writeHead(200,_headers);
    res.end();
  } else{
    res.writeHead(404,_headers);
    res.write(JSON.stringify({
      "status":"false",
      "message":"無此網站路由"
    }));
    res.end();
  }
}

const server=http.createServer(requestListener);
server.listen(3001);
為了要使用uuid,所以我們要先用npm install uuid --save 安裝好uuid,並且require引入
我們先創建一個存放待辦事項的物件在app.js上。只要使用nodemon app.js 期間,因為沒有重啟,記憶體沒有遺失
所以不管造訪幾次首頁取得的uuid都會相同。但是當今天有更改app.js,nodemon會自動新啟動server,這時候再去get首頁一次uuid就會回傳不同的值了。
如果今天是在vercel或是heroku主機上的話,只要重新啟動server,則資料都會遺失。
新增待辦事項
組合post過來的封包
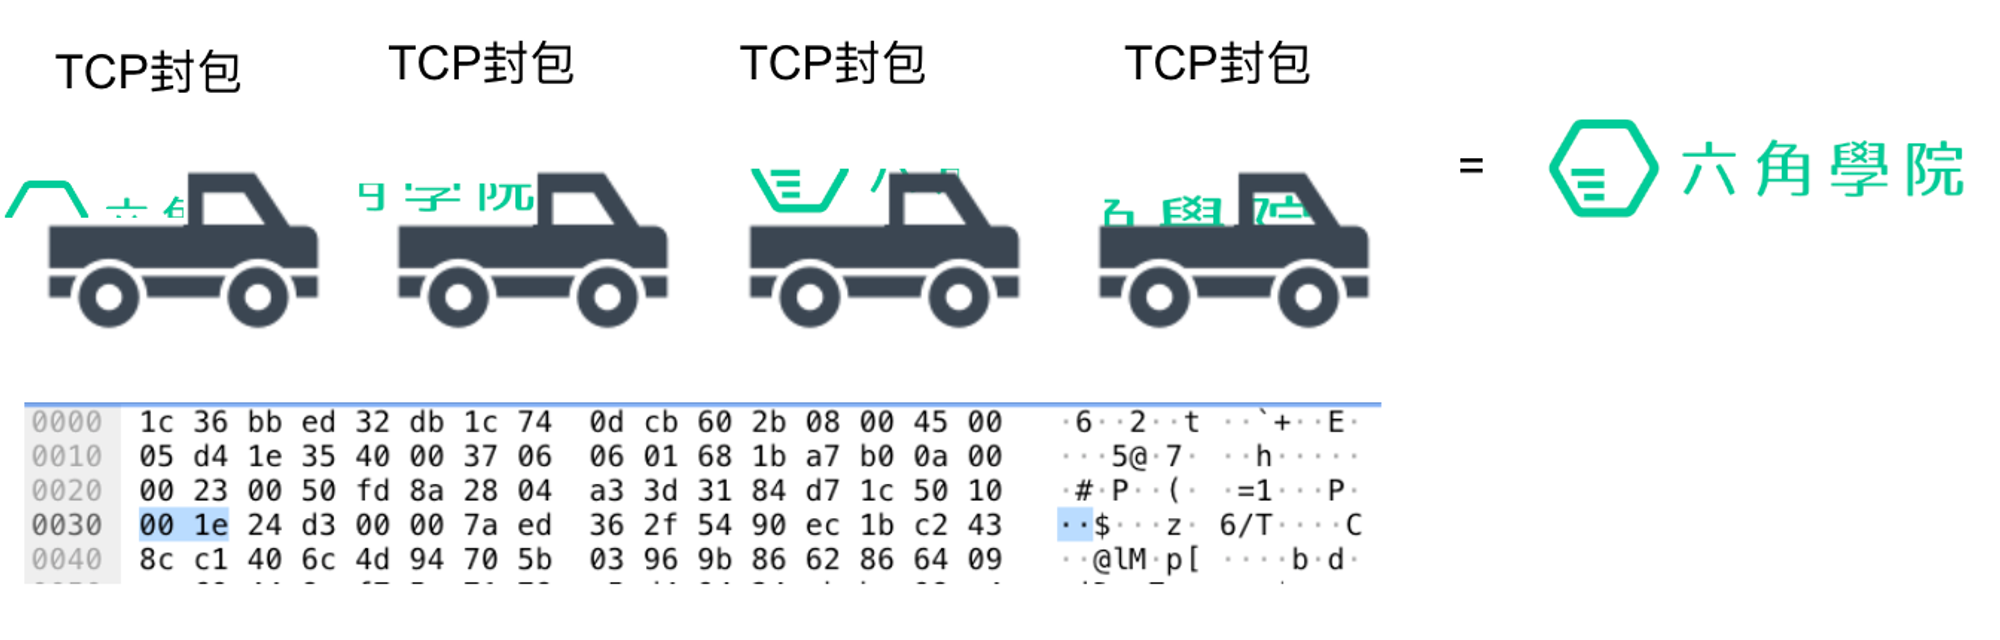
今天我們在製作新增待辦事項功能之前,要先了解nodejs底層組合封包的方式
今天使用者透過post method傳送過來的檔案有可能很大,這時候就需要分段拆分成好幾個封包
並且在接收完資料之後,判斷資料的正確性。最後才是做出我們需要的新增待辦事項功能
node.js官方文件有提供接收資料的方式如下:
- API for stream consumers | Nodejs Docs
const http = require('node:http');
const server = http.createServer((req, res) => {
  // `req` is an http.IncomingMessage, which is a readable stream.
  // `res` is an http.ServerResponse, which is a writable stream.

  let body = '';
  // Get the data as utf8 strings.
  // If an encoding is not set, Buffer objects will be received.
  req.setEncoding('utf8');

  // Readable streams emit 'data' events once a listener is added.
  req.on('data', (chunk) => {
    body += chunk;
  });

  // The 'end' event indicates that the entire body has been received.
  req.on('end', () => {
    try {
      const data = JSON.parse(body);
      // Write back something interesting to the user:
      res.write(typeof data);
      res.end();
    } catch (er) {
      // uh oh! bad json!
      res.statusCode = 400;
      return res.end(`error: ${er.message}`);
    }
  });
});

server.listen(1337);

// $ curl localhost:1337 -d "{}"
// object
// $ curl localhost:1337 -d "\"foo\""
// string
// $ curl localhost:1337 -d "not json"
// error: Unexpected token 'o', "not json" is not valid JSON
參考官方資料的寫法,我們的程式碼目前如下:
const http=require('http');
const { json } = require('stream/consumers');
const {v4:uuidv4}=require('uuid');

const todos=[
  {
    "title":"今天要念書",
    "id":uuidv4()
  }
];
const requestListener=(req,res)=>{
  // 宣告一個body空字串,用來組合chunk的內容
  let body='';
  let chungCount=0;
  req.on('data', (chunk) => {
    console.log(chunk);
    // 累加chunk的內容在body字串上,組合成完整的資訊
    body += chunk;
    chungCount++;
  });
  req.on('end', () => {
    // 先做一個錯誤判斷
    try {
      const data = JSON.parse(body);
      // res.write(data);
      // res.end();
      console.log(body)
      console.log('封包傳送次數為:'+chungCount);
    } catch (er) {
      // uh oh! bad json!
      res.statusCode = 400;
      return res.end(`error: ${er.message}`);
    }
  });
  // 先定義好headers的變數,之後就不用一直撰寫Content-Type
  const _headers={
  'Access-Control-Allow-Headers': 'Content-Type, Authorization, Content-Length, X-Requested-With',
  'Access-Control-Allow-Origin': '*',
  'Access-Control-Allow-Methods': 'PATCH, POST, GET,OPTIONS,DELETE',
  // 設定回傳值要使用json去解析
  'Content-Type': 'application/json'
  }
  if(req.url==='/'&&req.method==="GET"){
    res.writeHead(200,_headers);
    res.write(JSON.stringify({
      "status":"success",
      "data":todos
    }));
    res.end();
  }else if(req.method==="OPTIONS"){
    // 加上Preflight的OPTIONS method回傳值,這邊只要簡單給予一個200ok的status就可以了
    res.writeHead(200,_headers);
    res.end();
  } else{
    res.writeHead(404,_headers);
    res.write(JSON.stringify({
      "status":"false",
      "message":"無此網站路由"
    }));
    res.end();
  }
}

const server=http.createServer(requestListener);
server.listen(3001);
封包傳送觀念圖解
今天封包傳送的方式如下,可能會拆分成很多個片段,每個片段都沒有辦法單獨去讀取,要組合起來才會有意義。
製作新增待辦事項API
前面的封包組合功能,並沒有包裝在API內。
所以我們現在要將res.on(’end’()=>{})內容放到req.url==='/todos'&&req.method==="POST”路由內,才符合我們的需求。
這樣當資料傳送完畢,組裝之後,就會在post api內觸發,當組裝完畢而且透過try catch確認資料是沒有問題的時候,就會新增一個todo物件,並且將todo給push到最外層的todos陣列中。
修改程式碼如下:
const http=require('http');
const { json } = require('stream/consumers');
const {v4:uuidv4}=require('uuid');

const todos=[];
const requestListener=(req,res)=>{
  // 宣告一個body空字串,用來組合chunk的內容
  let body='';
  req.on('data', (chunk) => {
    // 累加chunk的內容在body字串上,組合成完整的資訊
    body += chunk;
  });
  // 先定義好headers的變數,之後就不用一直撰寫Content-Type
  const _headers={
  'Access-Control-Allow-Headers': 'Content-Type, Authorization, Content-Length, X-Requested-With',
  'Access-Control-Allow-Origin': '*',
  'Access-Control-Allow-Methods': 'PATCH, POST, GET,OPTIONS,DELETE',
  // 設定回傳值要使用json去解析
  'Content-Type': 'application/json'
  }
  if(req.url==='/todos'&&req.method==="GET"){
    res.writeHead(200,_headers);
    res.write(JSON.stringify({
      "status":"success",
      "data":todos
    }));
    res.end();
  }else if(req.url==='/todos'&&req.method==="POST"){
    // 將on end移動到api內
    req.on('end', () => {
      try {
        const data = JSON.parse(body).title;
        const todo={
          "title":data,
          "id":uuidv4()
        }
        todos.push(todo);
        console.log(todos);
        res.writeHead(200,_headers);
        res.write(JSON.stringify(todos));
        res.end();
      } catch (er) {
        res.writeHead(400,_headers);
        // res.write(er);
        res.end();
      }
    });
  } else if(req.method==="OPTIONS"){
    // 加上Preflight的OPTIONS method回傳值,這邊只要簡單給予一個200ok的status就可以了
    res.writeHead(200,_headers);
    res.end();
  } else{
    res.writeHead(404,_headers);
    res.write(JSON.stringify({
      "status":"false",
      "message":"無此網站路由"
    }));
    res.end();
  }
}

const server=http.createServer(requestListener);
server.listen(3001);
處理例外資料
雖然前面已經有使用try/catch去處理非預期的例外了,但是我們還需要考慮使用者透過其他方式隨意填寫內容
我們需要再額外處理,避免讓不是我們需要的內容寫入資料庫
例外狀況可能有,使用者回傳的物件並沒有title這個屬性,所唷我們使用JSON.parse(body).title 就會回傳一個undefined給我們
這時候我們就可以另外新增一個判斷式,如果判斷具有title這個屬性,才將資料寫入。
實作功能程式碼如下:
const http=require('http');
const { json } = require('stream/consumers');
const {v4:uuidv4}=require('uuid');

const todos=[];
const requestListener=(req,res)=>{
  // 宣告一個body空字串,用來組合chunk的內容
  let body='';
  req.on('data', (chunk) => {
    // 累加chunk的內容在body字串上,組合成完整的資訊
    body += chunk;
  });
  // 先定義好headers的變數,之後就不用一直撰寫Content-Type
  const _headers={
  'Access-Control-Allow-Headers': 'Content-Type, Authorization, Content-Length, X-Requested-With',
  'Access-Control-Allow-Origin': '*',
  'Access-Control-Allow-Methods': 'PATCH, POST, GET,OPTIONS,DELETE',
  // 設定回傳值要使用json去解析
  'Content-Type': 'application/json'
  }
  if(req.url==='/todos'&&req.method==="GET"){
    res.writeHead(200,_headers);
    res.write(JSON.stringify({
      "status":"success",
      "data":todos
    }));
    res.end();
  }else if(req.url==='/todos'&&req.method==="POST"){
    // 將on移動到api內
    req.on("end", () => {
      try {
        const data = JSON.parse(body).title;
        if (data !== undefined) {
          const todo = {
            title: data,
            id: uuidv4(),
          };
          todos.push(todo);
          console.log(todos);
          res.writeHead(200, _headers);
          res.write(
            JSON.stringify({
              status: "success",
              data: todos,
            })
          );
        } else {
          res.writeHead(400, _headers);
          res.write(
            JSON.stringify({
              status: "failed",
              message: "未填寫正確",
            })
          );
        }
        res.end();
      } catch (er) {
        res.writeHead(400, _headers);
        res.write(
          JSON.stringify({
            status: "failed",
            message: "未填寫正確",
          })
        );
        res.end();
      }
    });
  } else if(req.method==="OPTIONS"){
    // 加上Preflight的OPTIONS method回傳值,這邊只要簡單給予一個200ok的status就可以了
    res.writeHead(200,_headers);
    res.end();
  } else{
    res.writeHead(404,_headers);
    res.write(JSON.stringify({
      "status":"false",
      "message":"無此網站路由"
    }));
    res.end();
  }
}

const server=http.createServer(requestListener);
server.listen(3001);
這邊只有簡單判斷是否沒有該屬性而已,還有其他例外例如:title的內容是��空字串,或是根本不是字串等等。
這時候就要另外再去處理~這邊就不考慮到這麼細節的地方。
例外重構模組化
在上述程式碼中,有好幾個區塊都是重複的。
這邊可以另外拆分出一個errorHandle的功能
首先先創建一個errorHandle.js的模組,這個模組最後會用commonJS的方式輸出一個function
製作一個function,並且有一個外部傳入的參數res。當我們在app.js中呼叫這個function的時候,需要帶入一個參數。這個參數為使用者在呼叫post api的時候,會提供給server的request跟response。
我們需要提供errorHandle function這個response的內容,errorHandle才會知道要回傳資料給誰。
,程式碼如下:
function errorHandle(res) {
  // 外部傳入參數res,才知道需要回傳給哪個使用者
  // 因為有使用到_headers,所以需要在errorHandle.js內在寫一次
  const _headers = {
    "Access-Control-Allow-Headers":
      "Content-Type, Authorization, Content-Length, X-Requested-With",
    "Access-Control-Allow-Origin": "*",
    "Access-Control-Allow-Methods": "PATCH, POST, GET,OPTIONS,DELETE",
    // 設定回傳值要使用json去解析
    "Content-Type": "application/json",
  };
  res.writeHead(400, _headers);
  res.write(
    JSON.stringify({
      status: "failed",
      message: "未填寫正確",
    })
  );
  res.end();
}
// 輸出模組
module.exports = errorHandle;
接著我們改寫原本的程式碼:
const http = require("http");
const { json } = require("stream/consumers");
const { v4: uuidv4 } = require("uuid");
// 引入模組
const errorHandle = require("./errorHandle");

const todos = [];
const requestListener = (req, res) => {
  // 宣告一個body空字串,用來組合chunk的內容
  let body = "";
  req.on("data", (chunk) => {
    // 累加chunk的內容在body字串上,組合成完整的資訊
    body += chunk;
  });
  // 先定義好headers的變數,之後就不用一直撰寫Content-Type
  const _headers = {
    "Access-Control-Allow-Headers":
      "Content-Type, Authorization, Content-Length, X-Requested-With",
    "Access-Control-Allow-Origin": "*",
    "Access-Control-Allow-Methods": "PATCH, POST, GET,OPTIONS,DELETE",
    // 設定回傳值要使用json去解析
    "Content-Type": "application/json",
  };
  if (req.url === "/todos" && req.method === "GET") {
    res.writeHead(200, _headers);
    res.write(
      JSON.stringify({
        status: "success",
        data: todos,
      })
    );
    res.end();
  } else if (req.url === "/todos" && req.method === "POST") {
    // 將on移動到api內
    req.on("end", () => {
      try {
        const data = JSON.parse(body).title;
        if (data !== undefined) {
          const todo = {
            title: data,
            id: uuidv4(),
          };
          todos.push(todo);
          console.log(todos);
          res.writeHead(200, _headers);
          res.write(
            JSON.stringify({
              status: "success",
              data: todos,
            })
          );
          res.end();
        } else {
          errorHandle(res);
        }
      } catch (er) {
        errorHandle(res);
      }
    });
  } else if (req.method === "OPTIONS") {
    // 加上Preflight的OPTIONS method回傳值,這邊只要簡單給予一個200ok的status就可以了
    res.writeHead(200, _headers);
    res.end();
  } else {
    res.writeHead(404, _headers);
    res.write(
      JSON.stringify({
        status: "false",
        message: "無此網站路由",
      })
    );
    res.end();
  }
};

const server = http.createServer(requestListener);
server.listen(3001);
刪除待辦事項
刪除所有待辦事項
首先,我們先來撰寫比較簡單的刪除所有待辦事項的功能。
在前面我們規劃的API列表中,刪除所有待辦事項只需要確認路由以及方法即可,不需要去讀取挾帶的資料。
| 操作行為 | 路由 | 方法 |
|---|---|---|
| 取得所有待辦事項 | url/todos | GET |
| 刪除所有待辦事項 | url/todos | DELETE |
| 新增待辦事項 | url/todos | POST |
| 刪除指定待辦事項 | url/todos/uuid | DELETE |
| 編輯指定待辦事項 | url/todos/uuid | PATCH |
清空陣列的小技巧
將todos全部清空的方法中,最簡單的就是直接將陣列的長度設為0
todos.length=0
目前為止的程式碼如下:
const http = require("http");
const { json } = require("stream/consumers");
const { v4: uuidv4 } = require("uuid");
// 引入模組
const errorHandle = require("./errorHandle");

const todos = [];
const requestListener = (req, res) => {
  // 宣告一個body空字串,用來組合chunk的內容
  let body = "";
  req.on("data", (chunk) => {
    // 累加chunk的內容在body字串上,組合成完整的資訊
    body += chunk;
  });
  // 先定義好headers的變數,之後就不用一直撰寫Content-Type
  const _headers = {
    "Access-Control-Allow-Headers":
      "Content-Type, Authorization, Content-Length, X-Requested-With",
    "Access-Control-Allow-Origin": "*",
    "Access-Control-Allow-Methods": "PATCH, POST, GET,OPTIONS,DELETE",
    // 設定回傳值要使用json去解析
    "Content-Type": "application/json",
  };
  if (req.url === "/todos" && req.method === "GET") {
    res.writeHead(200, _headers);
    res.write(
      JSON.stringify({
        status: "success",
        data: todos,
      })
    );
    res.end();
  } else if (req.url === "/todos" && req.method === "POST") {
    // 將on移動到api內
    req.on("end", () => {
      try {
        const data = JSON.parse(body).title;
        if (data !== undefined) {
          const todo = {
            title: data,
            id: uuidv4(),
          };
          todos.push(todo);
          console.log(todos);
          res.writeHead(200, _headers);
          res.write(
            JSON.stringify({
              status: "success",
              data: todos,
            })
          );
          res.end();
        } else {
          errorHandle(res);
        }
      } catch (er) {
        errorHandle(res);
      }
    });
  } else if(req.url==="/todos"&&req.method==="DELETE"){
    todos.length=0;
    res.writeHead(200,_headers);
    res.write(JSON.stringify({
      "status":"success",
      "data":todos
    }))
    res.end();
  } else if (req.method === "OPTIONS") {
    // 加上Preflight的OPTIONS method回傳值,這邊只要簡單給予一個200ok的status就可以了
    res.writeHead(200, _headers);
    res.end();
  } else {
    res.writeHead(404, _headers);
    res.write(
      JSON.stringify({
        status: "false",
        message: "無此網站路由",
      })
    );
    res.end();
  }
};

const server = http.createServer(requestListener);
server.listen(3001);
刪除指定待辦事項預備知識
在開始實作刪除指定待辦事項之前,要先了解一些陣列和字串的操作方法
因為我們在規劃api的時候,如果要刪除指定待辦事項,前面的路由仍然是url/todos,差別只有在後面有沒有接上指定的uuid,所以這邊我們需要了解幾個陣列跟字串的方法,讓我們可以去判斷url/todos後面還有沒有指定特定的待辦事項。
-
startsWith:使用startsWith會比較傳入的參數,並且判斷是否有符合回傳一個布林值。
舉例來說,”/todos/uuid”.startsWith(”/todos/”)會回傳一個true。
但是如果今天/todos後面並沒有斜線,則startsWith會返回一個false,這樣就可以判斷出後面有沒有另外指定一個uuid,等到判斷後面有指定的uuid時,後續再接著判斷uuid是否存在。 -
split:使用split可以根據我們傳入的值去切割字串
例如,”/todos/uuid”.split(’/’)會回傳[’’,’todos’,’uuid’]
代表我們要根據/來拆分這個字串,回傳則是使用陣列的方式 因為回傳值為陣列,所以這邊可以在使用pop將最後的內容給傳出來。範例如下:
const uuid="/todos/112233".split('/').pop(); //112233 -
findIndex:直接透過範例來了解const array1 = [5, 12, 8, 130, 44];
const isLargeNumber = (element) => element > 13;
console.log(array1.findIndex(isLargeNumber));
// Expected output: 3array1中的��每個數字都會依序去執行isLargeNumber這個function,判斷如果該數值大於13,isLargeNumber會回傳一個true。findIndex接收到true之後,就會回傳目前的索引值。當array1全部都跑完,仍然沒有找到符合條件的內容時,則會回傳
-1 -
splice:splice的語法參數分別為:起始index,刪除數量,插入內容const months = ['Jan', 'March', 'April', 'June'];
months.splice(2,0,'test','test2',3);
console.log(months) // ["Jan", "March", "test", "test2", 3, "April", "June"]
刪除指定待辦事項
程式碼如下:
const http = require("http");
const { json } = require("stream/consumers");
const { v4: uuidv4 } = require("uuid");
// 引入模組
const errorHandle = require("./errorHandle");
const { todo } = require("node:test");

const todos = [];
const requestListener = (req, res) => {
  // 宣告一個body空字串,用來組合chunk的內容
  let body = "";
  req.on("data", (chunk) => {
    // 累加chunk的內容在body字串上,組合成完整的資訊
    body += chunk;
  });
  // 先定義好headers的變數,之後就不用一直撰寫Content-Type
  const _headers = {
    "Access-Control-Allow-Headers":
      "Content-Type, Authorization, Content-Length, X-Requested-With",
    "Access-Control-Allow-Origin": "*",
    "Access-Control-Allow-Methods": "PATCH, POST, GET,OPTIONS,DELETE",
    // 設定回傳值要使用json去解析
    "Content-Type": "application/json",
  };
  if (req.url === "/todos" && req.method === "GET") {
    res.writeHead(200, _headers);
    res.write(
      JSON.stringify({
        status: "success",
        data: todos,
      })
    );
    res.end();
  } else if (req.url === "/todos" && req.method === "POST") {
    // 將on移動到api內
    req.on("end", () => {
      try {
        const data = JSON.parse(body).title;
        if (data !== undefined) {
          const todo = {
            title: data,
            id: uuidv4(),
          };
          todos.push(todo);
          console.log(todos);
          res.writeHead(200, _headers);
          res.write(
            JSON.stringify({
              status: "success",
              data: todos,
            })
          );
          res.end();
        } else {
          errorHandle(res);
        }
      } catch (er) {
        errorHandle(res);
      }
    });
  } else if(req.url==="/todos"&&req.method==="DELETE"){
    todos.length=0;
    res.writeHead(200,_headers);
    res.write(JSON.stringify({
      "status":"success",
      "data":todos
    }))
    res.end();
  } else if(req.url.startsWith('/todos/')&&req.method==="DELETE"){
    const id=req.url.split('/').pop();
    const index=todos.findIndex(todo=>todo.id===id);
    if(index!==-1){
      todos.splice(index,1);
      res.writeHead(200,_headers);
      res.write(JSON.stringify({
        "status":"success",
        "data":todos
      }))
      res.end();
    }else{
      errorHandle(res);
    }
  } else if (req.method === "OPTIONS") {
    // 加上Preflight的OPTIONS method回傳值,這邊只要簡單給予一個200ok的status就可以了
    res.writeHead(200, _headers);
    res.end();
  } else {
    res.writeHead(404, _headers);
    res.write(
      JSON.stringify({
        status: "false",
        message: "無此網站路由",
      })
    );
    res.end();
  }
};

const server = http.createServer(requestListener);
server.listen(3001);
首先在路由判斷的地方使用startsWith,判斷/todos後方還有沒有/uuid,並且同時判斷method是否為DELETE
接著利用split,pop取出uuid的值,再利用findIndex去查詢todos內是否有物件,其屬性uuid內容是符合我們取出來的值
因為有可能值有所錯誤,所以我們要先檢查findIndex所回傳出來的值是否為-1,-1代表並沒有相符的值。檢查確認不是-1的時候,就可以將該筆資料利用splice刪除。如果檢查結果找不到該筆資料(回傳-1)時,就使用errorHnalde去回傳錯誤資訊。
編輯待辦事項
編輯待��辦事項與先前的刪除單筆待辦事項很像。程式碼如下:
const http = require("http");
const { json } = require("stream/consumers");
const { v4: uuidv4 } = require("uuid");
// 引入模組
const errorHandle = require("./errorHandle");
const { todo } = require("node:test");

const todos = [];
const requestListener = (req, res) => {
  // 宣告一個body空字串,用來組合chunk的內容
  let body = "";
  req.on("data", (chunk) => {
    // 累加chunk的內容在body字串上,組合成完整的資訊
    body += chunk;
  });
  // 先定義好headers的變數,之後就不用一直撰寫Content-Type
  const _headers = {
    "Access-Control-Allow-Headers":
      "Content-Type, Authorization, Content-Length, X-Requested-With",
    "Access-Control-Allow-Origin": "*",
    "Access-Control-Allow-Methods": "PATCH, POST, GET,OPTIONS,DELETE",
    // 設定回傳值要使用json去解析
    "Content-Type": "application/json",
  };
  if (req.url === "/todos" && req.method === "GET") {
    res.writeHead(200, _headers);
    res.write(
      JSON.stringify({
        status: "success",
        data: todos,
      })
    );
    res.end();
  } else if (req.url === "/todos" && req.method === "POST") {
    // 將on移動到api內
    req.on("end", () => {
      try {
        const data = JSON.parse(body).title;
        if (data !== undefined) {
          const todo = {
            title: data,
            id: uuidv4(),
          };
          todos.push(todo);
          res.writeHead(200, _headers);
          res.write(
            JSON.stringify({
              status: "success",
              data: todos,
            })
          );
          res.end();
        } else {
          errorHandle(res);
        }
      } catch (er) {
        errorHandle(res);
      }
    });
  } else if (req.url === "/todos" && req.method === "DELETE") {
    todos.length = 0;
    res.writeHead(200, _headers);
    res.write(
      JSON.stringify({
        status: "success",
        data: todos,
      })
    );
    res.end();
  } else if (req.url.startsWith("/todos/") && req.method === "DELETE") {
    const id = req.url.split("/").pop();
    const index = todos.findIndex((todo) => todo.id === id);
    if (index !== -1) {
      todos.splice(index, 1);
      res.writeHead(200, _headers);
      res.write(
        JSON.stringify({
          status: "success",
          data: todos,
        })
      );
      res.end();
    } else {
      errorHandle(res);
    }
  } else if (req.url.startsWith("/todos") && req.method === "PATCH") {
    req.on("end", () => {
        try {
          const data = JSON.parse(body).title;
          const id = req.url.split("/").pop();
          const index = todos.findIndex((Element) => Element.id === id);
          if (data !== undefined && index !== -1) {
            todos[index].title = data;
            res.writeHead(200, _headers);
            res.write(
              JSON.stringify({
                status: "success",
                data: todos,
                method: "PATCH",
              })
            );
            res.end();
          } else {
            errorHandle(res);
          }
        } catch (er) {
          errorHandle(res);
        }
      });
  } else if (req.method === "OPTIONS") {
    // 加上Preflight的OPTIONS method回傳值,這邊只要簡單給予一個200ok的status就可以了
    res.writeHead(200, _headers);
    res.end();
  } else {
    res.writeHead(404, _headers);
    res.write(
      JSON.stringify({
        status: "false",
        message: "無此網站路由",
      })
    );
    res.end();
  }
};

const server = http.createServer(requestListener);
server.listen(3001);
首先先判斷路由,確定是後面有接上uuid,並且req.method是PATCH的方法。
接著因為需要編輯資料,所以一樣要等到req.on結束之後才可以執行裡面的function,同樣要使用try catch 的方式去判斷客戶端是否有傳送我們規定的JSON格式資訊。
如果有正確接收到JSON格式資訊,接著還需要查詢該路由提供的uuid是否有存在在todos內。如果沒有存在,findIndex會回傳-1,所以除了判斷回傳資料是否有title屬性外,還需要判斷index值是否為-1。如果有title屬性,且index不為-1(有找到),則會將回傳的title寫入到todos內,並且將寫入資料回傳給使用者。
小結
以上是製作一個todolist簡單的CRUD Restful API。實務上會將資料寫入資料庫,而且還有更多問題需要收斂。
可以發現每次都需要寫許多程式碼來判斷路由以及http request method以這麼簡單的範例來看就覺得很繁瑣了,加上實際使用還會有更多的需求,例如動態路由等等。
所以後續我們就要來介紹Express啦!使用Express可以讓我們更方便的管理路由。